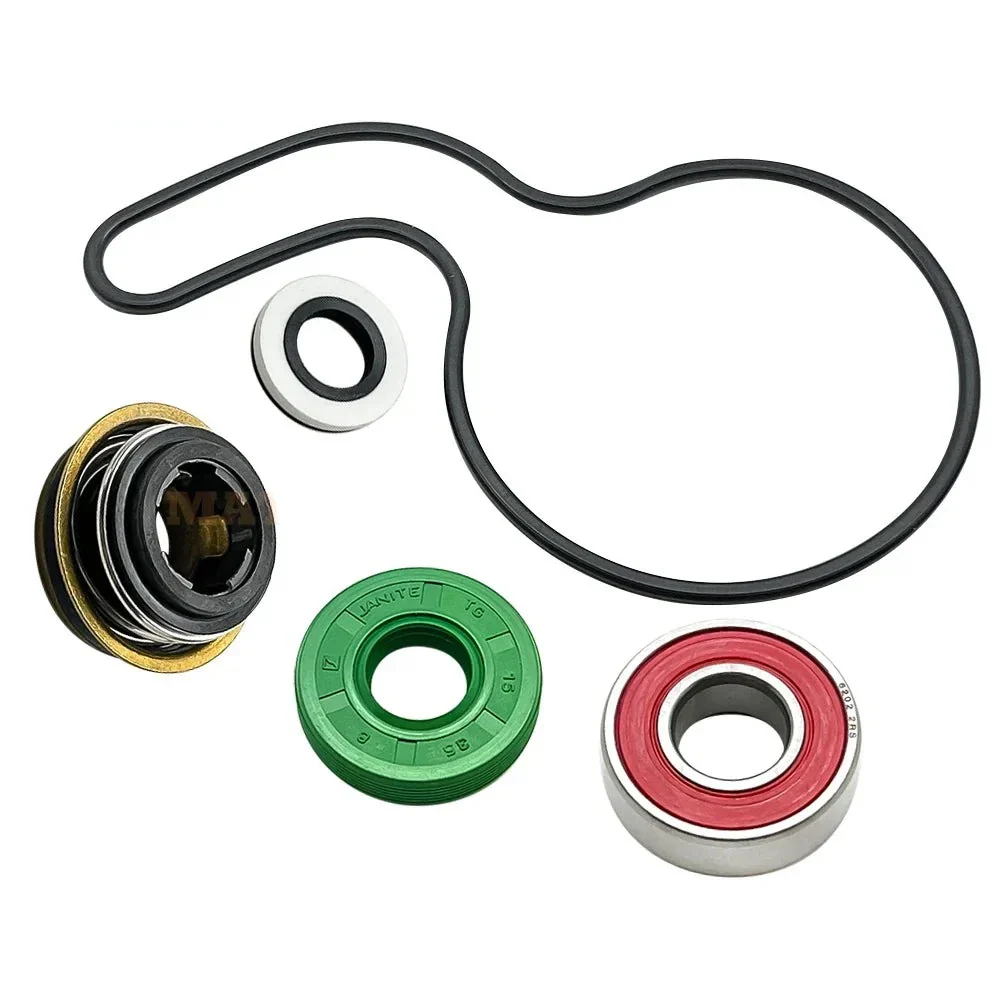
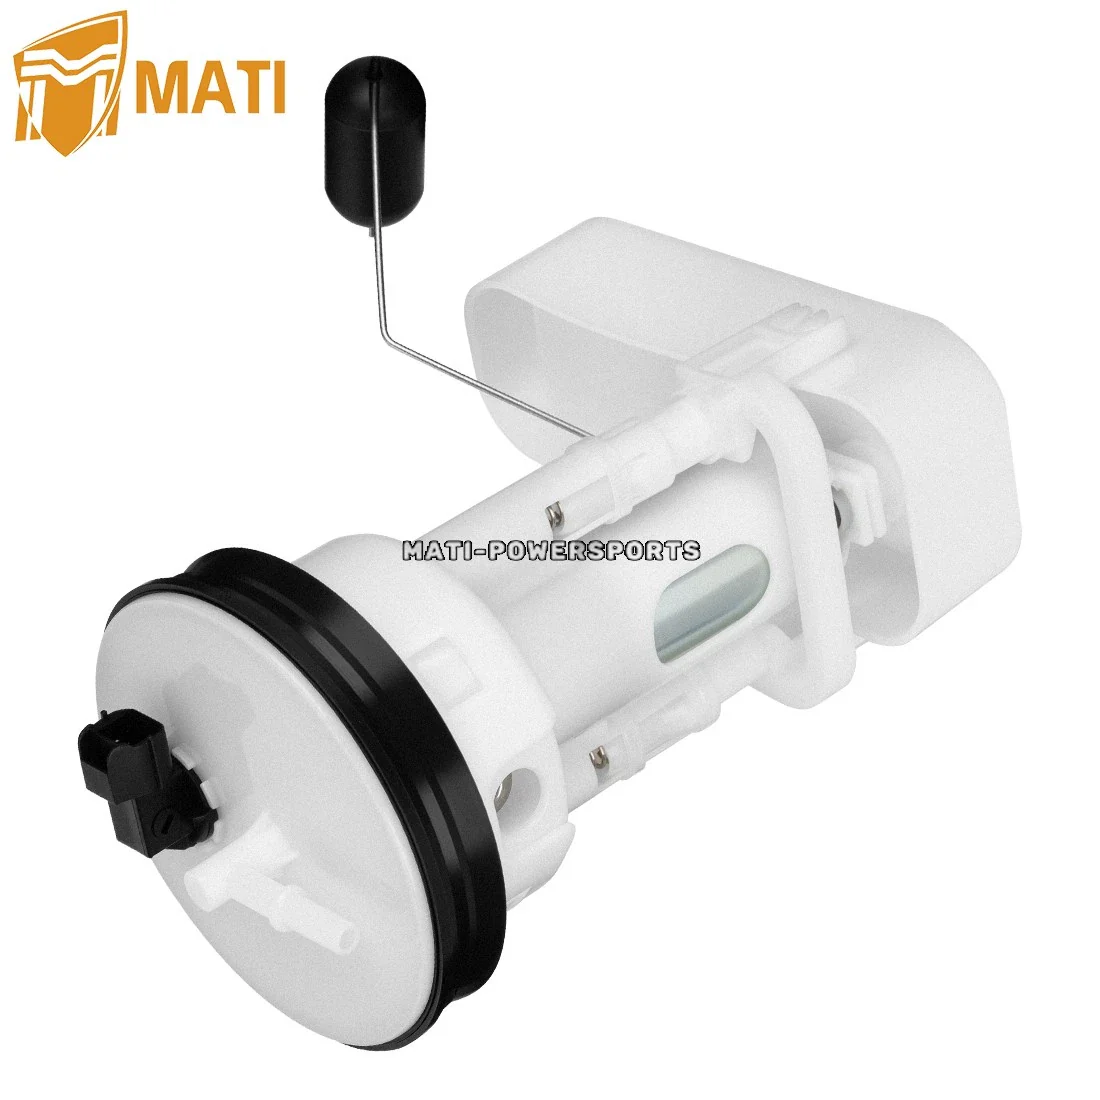
For Suzuki KingQuad Fuel Pump - LT-A450/500/750 AXi 450 500 750 15100-31G21
Brand Name: M MATI
Origin: Mainland China
For ATV Brand/Model: Suzuki
Special Features: Fuel Pump Assembly
MPN : 15100-31G21 15100-31G03 15100-31G30 15100-31G31
Package : Fuel Pump Assembly x1
Placement on Vehicle: Fuel Pump
Warranty : 1 year
Condition: New
🛠️ Pro Installation Tips
-
Safety First: Ensure you are working in a well-ventilated area away from any sparks or open flames. Disconnect the negative battery terminal before starting to prevent any electrical mishaps.
-
Clean the Area: Before removing the old pump, use compressed air or a brush to clear any dirt and debris from the top of the tank. Do not let contaminants fall into the fuel tank, as they can clog the new strainer instantly.
-
Lube the Seal: Always use the new O-ring/gasket included. Apply a thin layer of clean fuel or silicone grease to the seal before installation. This ensures a proper seat and prevents the seal from pinching or tearing.
-
Alignment is Key: Most Suzuki KingQuad fuel tanks have alignment marks. Ensure the pump assembly is oriented correctly so the fuel level float can move freely without hitting the tank walls.
-
Prime the System: Do not start the engine immediately after installation. Turn the ignition key to the ON position for 5 seconds and back to OFF, repeating this 3-5 times. This primes the pump and builds up the necessary fuel pressure.
-
Tank Condition: If your previous pump failed due to debris or "bad gas," we strongly recommend draining and cleaning the fuel tank before installing the new unit to prevent premature failure.
⚠️ Notice: Professional installation is highly recommended. Improper installation can lead to fuel leaks or inaccurate fuel gauge readings.
Fit for following Suzuki ATV
KingQuad AXi 450 4x4 LT-A450XK8 2008 2010
KingQuad AXi 450 4x4 LT-A450XK9 2010
KingQuad AXi 450 4x4 LT-A450XZ 2009 (Exclude LT-A450XZK9 & LT-A450XZK8 Edition)
KingQuad AXi 450 4x4 LT-A450XL0 2010
KingQuad AXi 500 LT-A500XPL2 2012
KingQuad AXi 500 LT-A500 2013-2023 (Exclude LT-A500 XL3 & LT-A500XZL3 Edition)
KingQuad AXi 750 LT-A750 2012-2023 (Exclude LT-A750XZL2 & LT-A750XL3 & LT-A750XZL3 E
🔧 Tools Required
Most Suzuki KingQuad models will require these basic tools:
-
Socket Set (8mm & 10mm): To remove seat/plastics and the fuel pump mounting bolts.
-
Phillips Head Screwdriver: For body clips and panel removal.
-
Needle-Nose Pliers: To safely release the fuel line quick-connect clips.
-
Compressed Air or Soft Brush: To clean the tank surface before opening.
-
Clean Shop Rags: To catch any residual fuel when disconnecting lines.
| Issue | Possible Cause | Solution |
| Engine won't start | System not primed or air in lines. | Cycle the ignition Key ON/OFF 5 times to build pressure before cranking. |
| No "Humming" sound | No power to the pump. | Check the Fuel Pump Fuse and the Relay. Ensure the electrical connector is clicked in tight. |
| Fuel gauge is stuck/wrong | Float arm is obstructed. | The pump might be rotated slightly. Ensure the alignment marks on the pump and tank match perfectly. |
| Sputtering/Low Power | Clogged fuel line or old gas. | Inspect fuel lines for kinks and ensure you are using fresh, clean fuel. |
| Fuel leak at the top | Pinched O-ring or loose bolts. | Inspect the seal for tears. Ensure mounting bolts are tightened in a star pattern for even pressure. |
💡 Final Expert Tip:
Before fully reassembling all the plastic bodywork, test-start the ATV and check for leaks around the seal and hose connections. It’s much easier to fix a minor seating issue while the tank is still exposed!


Description
Brand Name: M MATI
Origin: Mainland China
For ATV Brand/Model: Suzuki
Special Features: Fuel Pump Assembly
MPN : 15100-31G21 15100-31G03 15100-31G30 15100-31G31
Package : Fuel Pump Assembly x1
Placement on Vehicle: Fuel Pump
Warranty : 1 year
Condition: New
🛠️ Pro Installation Tips
-
Safety First: Ensure you are working in a well-ventilated area away from any sparks or open flames. Disconnect the negative battery terminal before starting to prevent any electrical mishaps.
-
Clean the Area: Before removing the old pump, use compressed air or a brush to clear any dirt and debris from the top of the tank. Do not let contaminants fall into the fuel tank, as they can clog the new strainer instantly.
-
Lube the Seal: Always use the new O-ring/gasket included. Apply a thin layer of clean fuel or silicone grease to the seal before installation. This ensures a proper seat and prevents the seal from pinching or tearing.
-
Alignment is Key: Most Suzuki KingQuad fuel tanks have alignment marks. Ensure the pump assembly is oriented correctly so the fuel level float can move freely without hitting the tank walls.
-
Prime the System: Do not start the engine immediately after installation. Turn the ignition key to the ON position for 5 seconds and back to OFF, repeating this 3-5 times. This primes the pump and builds up the necessary fuel pressure.
-
Tank Condition: If your previous pump failed due to debris or "bad gas," we strongly recommend draining and cleaning the fuel tank before installing the new unit to prevent premature failure.
⚠️ Notice: Professional installation is highly recommended. Improper installation can lead to fuel leaks or inaccurate fuel gauge readings.
Fit for following Suzuki ATV
KingQuad AXi 450 4x4 LT-A450XK8 2008 2010
KingQuad AXi 450 4x4 LT-A450XK9 2010
KingQuad AXi 450 4x4 LT-A450XZ 2009 (Exclude LT-A450XZK9 & LT-A450XZK8 Edition)
KingQuad AXi 450 4x4 LT-A450XL0 2010
KingQuad AXi 500 LT-A500XPL2 2012
KingQuad AXi 500 LT-A500 2013-2023 (Exclude LT-A500 XL3 & LT-A500XZL3 Edition)
KingQuad AXi 750 LT-A750 2012-2023 (Exclude LT-A750XZL2 & LT-A750XL3 & LT-A750XZL3 E
🔧 Tools Required
Most Suzuki KingQuad models will require these basic tools:
-
Socket Set (8mm & 10mm): To remove seat/plastics and the fuel pump mounting bolts.
-
Phillips Head Screwdriver: For body clips and panel removal.
-
Needle-Nose Pliers: To safely release the fuel line quick-connect clips.
-
Compressed Air or Soft Brush: To clean the tank surface before opening.
-
Clean Shop Rags: To catch any residual fuel when disconnecting lines.
| Issue | Possible Cause | Solution |
| Engine won't start | System not primed or air in lines. | Cycle the ignition Key ON/OFF 5 times to build pressure before cranking. |
| No "Humming" sound | No power to the pump. | Check the Fuel Pump Fuse and the Relay. Ensure the electrical connector is clicked in tight. |
| Fuel gauge is stuck/wrong | Float arm is obstructed. | The pump might be rotated slightly. Ensure the alignment marks on the pump and tank match perfectly. |
| Sputtering/Low Power | Clogged fuel line or old gas. | Inspect fuel lines for kinks and ensure you are using fresh, clean fuel. |
| Fuel leak at the top | Pinched O-ring or loose bolts. | Inspect the seal for tears. Ensure mounting bolts are tightened in a star pattern for even pressure. |
💡 Final Expert Tip:
Before fully reassembling all the plastic bodywork, test-start the ATV and check for leaks around the seal and hose connections. It’s much easier to fix a minor seating issue while the tank is still exposed!